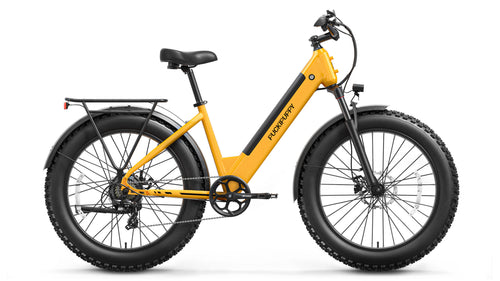
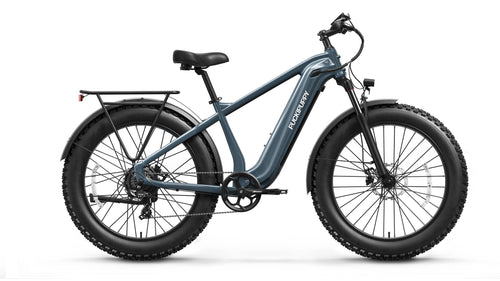
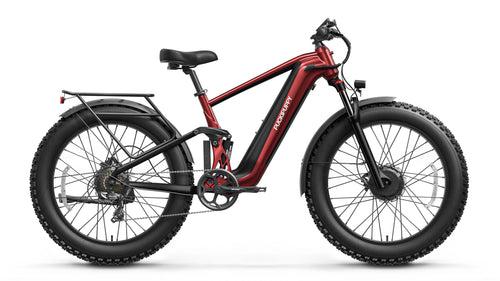
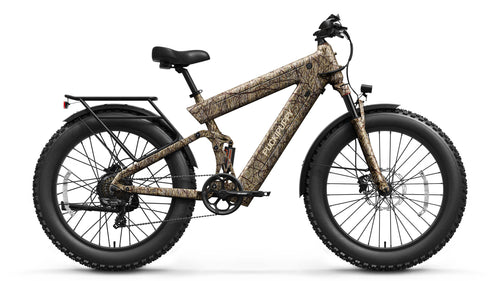
Hero Banner

Return Policy

Return Policy
Shipping Info
Warranty
Privacy Policy
Terms of Service
Cookie Policy
FAQ

Cancel Order

Because we process orders quickly, you must cancel your order within one day of placing it. We will not be able to cancel the order if it has been submitted to the warehouse. If necessary, please see the Return Policy below for return terms and instructions for returning your order for a refund. 

    Cancel Success

    Card Processing Fee: After successfully canceling the order, we will deduct 5% of the merchant card processing fee from your refund. (Customer's card processing fee is waived for exchanges.)
    To cancel your order, please follow these steps:
    1. Log in to your account on our website.
    2. Once logged in, navigate to the "My Account" section.
    3. Under the "Order Details" section, find the specific order you want to cancel.
    4. Please note that the cancellation request is only valid after the order is placed but before the order is submitted to the warehouse.
    5. Click the "Cancel Order" button to initiate the cancellation process.

    Return Request

    All returns must be approved before being shipped back to us. Once your return cancellation request is approved, you will receive a prepaid return shipping label with puckipuppy's prior authorization. We will not issue a refund if a product is returned without our approval. Puckipuppy rejects all unscheduled arrivals. To begin the process, please send us an email (421 S.BROOKHURST ST. SUITE 1312ANAHEIM, CA 92804, support@puckipuppy.com) and attach a photo of the product.

    Return The Goods

    Customers can submit a return request within 15 days of delivery at support@puckipuppy.com. Return requests submitted 15 days after the delivery date will not be approved.
    New and Unopened Items Returns Within 15 Days of Received: We allow you to return any item in new and unused condition within 15 days of receipt for a full refund with no restocking fees, just Less shipping ($150) and merchant card processing fee (5%), return shipping is the recipient's responsibility for all returns unless we make a shipping error. We will issue a refund using the same payment method you originally used.
    Returns of Used or Opened Items: Any item returned in used condition may be returned within 15 days of purchase, subject to return shipping ($150) and twenty percent (20%) of the purchase price for restocking fees, and a merchant card processing fee (5%). Items must be free of any wear, dirt, scratches or any signs of use, must be in the same packaging and condition as when you received the bike, and must contain all contents of the box. The e-bike must have less than twenty (20) miles on its odometer.
    Return Shipping: You will be responsible for paying your own shipping costs for returning the item. Shipping charges are non-refundable.

    Exchange

    Model swap only applies to e-bikes. If you want to change to another model, you can contact our customer service in advance to place a new order for the required model and return the original order. All exchange requests are subject to our return policy and receive pre-approval notification via email from our customer service team. Please note that free shipping does not apply to replacement bikes.

    Refund

    The final refund amount may be deducted from the original order's restocking fee, return shipping and credit card processing fees. For return orders, refunds will not be approved until the return package is successfully delivered and inspected by the warehouse. Customers will be notified by email and will receive a refund of the original method of payment. Please note that the bank or credit card company may take up to 15 additional days to process the refund.

    Purchase

    How long will it take for me to receive the electric bike I purchased?

    Orders will be processed within 48 hours on business days. Once the order has been shipped, a shipping confirmation email will be sent to your email address. We use FedEx for transportation. Please allow 2-7 business days for the shipment to reach your specified location. Pre-order orders will have the estimated shipping date indicated on the product page. Any delivery dates provided by PUCKIPUPPY are estimated dates.

    How much is the shipping fee?

    All electric bikes enjoy free shipping service. Our shipping service is only available for addresses within the continental United States, which includes 48 states.

    Are taxes required for the order?

    State sales tax (and applicable local sales tax) will be required and applied to all orders shipped to the following states: Alabama / District of Columbia / Arizona / Arkansas / California / Colorado / Connecticut / Florida / Georgia / Idaho / Illinois / Indiana / Iowa / Kansas / Kentucky / Louisiana / Maine / Maryland / Massachusetts / Michigan / Minnesota / Mississippi / Missouri / Nebraska / Nevada / New Jersey / New Mexico / New York / North Carolina / North Dakota / Ohio / Oklahoma / Pennsylvania / Rhode Island / South Carolina / South Dakota / Tennessee / Texas / Utah / Vermont / Virginia / Washington / West Virginia / Wisconsin / Wyoming.

    Do electric bikes need to be assembled?

    Electric bikes arrive partially assembled and require a few additional steps to complete the assembly. Please carefully watch the assembly tutorial or refer to the electric bike user manual for installation instructions. Assembly Tutorial.

    How can I track my order?

    You can click on "Track" to view your order status.

    Can discounts be stacked?

    Only one coupon can be used per order, and we do not support coupon stacking. The final interpretation right belongs to PUCKIPUPPY.

    Cycling

    What is the most suitable electric bike for me?

    You can read the electric bike buying guide or use the model comparison to choose the one that is most suitable for you.

    Do I need a driver's license to ride an electric bike on the road?

    Click here to learn about the regulations related to electric bikes.

    How long does the electric bike battery last?

    Under normal usage, your battery can last for 3-4 years.

    What preparations do I need to make before cycling?

    Please carefully read our electric bike user manual before cycling. If necessary, you can also refer to our blog for cycling safety guidelines.

    Maintenance and Troubleshooting

    How do I maintain an electric bike?

    Like any bicycle, electric bikes require regular maintenance to ensure safety and enjoyable riding. For more information on electric bike maintenance and cleaning, click here.

    What should I do if the bike doesn't start?

    Please check the cables to ensure they are not loose or disconnected. Simply loosen the black spiral wire cover until the quick disconnect plug is exposed, unplug it, and then reconnect it.

    Troubleshooting guide.

    1. Brake Malfunction
    Check if the brake cables are loose or damaged. If not, consider replacing the brake caliper or brake lever and cable.

    2. Assist Sensor Malfunction

    Step1: Check if the sensor wires are loose or detached. If not, it may indicate a faulty assist sensor. Step2: Disassemble and replace the assist sensor.

    3. Walk Assist Mode Error
    Turn off and restart the electric bike (if the issue persists, consider replacing the controller).

    4. Real-Time Mode Error
    Turn off and restart the electric bike (if the issue persists, consider replacing the controller).

    5. Low Voltage Error
    Step 1: Remove the battery and check if it has sufficient charge. Step 2: Charge the battery. Step 3: If the issue remains after completing the first two steps, it may indicate a faulty motor. Replace the motor.

    6. Motor Malfunction
    Check if the motor connection wires are loose, detached, or plugged in incorrectly (if not, it may indicate a faulty motor, consider replacing the motor).

    7. Twist Throttle Malfunction
    Check if the connection wires are loose or detached (if not, it may indicate a faulty twist throttle, replace the twist throttle).

    Brake Pad Replacement Guide

    Tools Needed: Needle-nose pliers, hex wrench, replacement brake pads.

    1. Removing the Brake Pads

    a. Prepare the bike for maintenance. Start by turning off the bike and removing the battery.

    b. Locate the brake pads. The brake pads are located inside the brake caliper on each wheel (refer to the photo).

    c. Begin by removing the brake caliper. Use a hex wrench to remove the two brake caliper bolts from the bike frame (caution: be careful not to lose or misplace the washers inside the brake caliper bolts).

    d. Carefully straighten the retaining pin with needle-nose pliers to remove the brake caliper bolts. Push up on the brake caliper.

    e. Remove the old brake pads. Depress the spring plate to release the retaining pins and old brake pads.

    2. Installing Brake Pads

    a. Install the new brake pads into the brake caliper. Assemble the brake pads in the same configuration as the old ones. The friction material should be facing each other. Ensure that the top holes of each pad align with the retaining pin holes. Slide the new brake pads into the caliper to complete the installation.

    b. Replace the brake pad retaining pins. Carefully bend the retaining pins to a 90° angle with needle-nose pliers to secure the brake caliper.

    c. Reinstall the caliper. Position the caliper, aligning the mounting holes on the frame with the mounting points on the caliper. Insert the bolts with a hex wrench and tighten them evenly.

    d. Before riding, reinstall the battery and test the brakes to ensure proper installation.

    Brake Adjustment (Loose/Tight)

    Tip: The best way to maintain brakes is to use both brakes simultaneously and engage the rear brake first to avoid excessive front wheel and fork tightening.

    Brake adjustment includes:

    · Check the wheels to ensure they are securely fastened in the frame dropouts. Improper wheel installation can cause the brake rotor to rub against the brake pads and create noise.

    · Inspect the brake rotor for flatness and good condition. Damaged or dirty brake rotors can result in decreased braking performance or noise.

    · Center the brake caliper by adjusting its positioning, bringing the inner pad (fixed part of the brake caliper) close to and parallel with the brake rotor. Incorrect brake pad or caliper positioning can lead to decreased braking performance or noise.

    · Adjust the brake cable tension and check the brake lever. These final adjustments will help ensure properly adjusted brakes.

    Crankset Replacement Guide

    Prepare the bike for maintenance. Remove the battery and hold the power button for 10 seconds to discharge any remaining power.

    1. Start by removing the left crank arm. Loosen the bolt with a hex wrench, then insert a crank puller tool to remove the crank arm.

    2. Follow the same steps for the right-side crank arm, first remove the bolt with a hex wrench, then insert the crank puller tool into the opening.

    3. Test the chain after installing the new crankset. The bike needs to be supported on a stand to elevate the rear wheel, and the crank must be rotated backward to rotate the rear wheel. Ensure the chain is properly connected to the chainrings.

    PAS Sensor Replacement Guide

    PAS Sensor Troubleshooting

    1. Crank Removal (Refer to Crank Removal Guide)

    a. Locate the PAS sensor behind the left pedal and check for any looseness.

    b. If the PAS sensor is not loose, follow the cable from the PAS sensor to the connector.

    c. Disconnect the PAS sensor connector and remove the controller.

    d. Check for any loose connections between the controller and PAS sensor.

    e.Inspect the connector for dirt, damage, or moisture. If there is dirt, damage, or moisture inside the connector, the sensor may need to be replaced.

    2. PAS Sensor Replacement

    a. Remove the old PAS sensor by disconnecting the cable from the main controller and loosening it.

    3. PAS Sensor Installation

    a. Install the new sensor, ensuring that the side with an arrow is facing towards the bike.

    b. Reinstall the battery and perform a comprehensive test before riding.

    Wiring Cable Troubleshooting

    The wiring harness connects various electrical components on the bike. If the PUCKIPUPPY product supports indicating performing a wiring harness connector check, follow these steps to ensure the connectors are properly inserted and functioning.

    Tools Needed: Hex wrench.

    Prepare the bike for maintenance. Remove the battery and hold the power button for 10 seconds to discharge any remaining power. Flip the bike over and place it on the handlebars to prevent damage to the LCD display during maintenance.

    1. Locate and remove the controller.

    2. Check for loose connections in the wiring harness and reconnect them. When disconnecting the connectors, they must be pulled straight apart without twisting. If the interior looks normal, align the inner notch and pin and press them together directly without twisting.

    3. Reinstall the controller following the above steps.

    4. Reinstall the battery and perform a thorough test before riding.

    Handlebar Grip and Stem Replacement Guide

    Tools Needed: Pliers, hex wrench.

    1. To remove the handlebars, start by loosening the handlebar clamp bolt.

    2. Pry off the handlebar grip and slide it off the handlebars.
    To remove the stem: Loosen the side bolts on the stem and then remove the center bolt from the stem. Then pull the stem off the fork.

    Odometer Replacement Guide

    Tools Needed: Hex wrench.

    LCD Display Removal:

    1. Prepare the bike for maintenance. Remove the battery and hold the power button for 10 seconds to discharge any remaining power.

    2. Disconnect the LCD display connector. Follow the cable from the back of the LCD display to the wiring harness.

    3. Pull apart both ends (without twisting) to disconnect the LCD display from the connecting cable.

    4. Remove the LCD display. Use a hex wrench to loosen the bolts securing the LCD display, then pull it off the handlebars.

    5. Remove the odometer controller. Loosen the clamping bolt with a hex wrench and remove it.

    Brake Lever Replacement Guide

    1. To remove the brake lever, first loosen the brake cable on the brake caliper.

    2. Depress the control lever to expose the internal mechanism, then loosen the brake cable cover on the control lever.

    3. Next, disconnect the cable from the brake caliper by pulling it, and loosen the bolt on the lever to remove it.

    Brake Rotor Replacement Guide

    1. Remove the wheel first, then remove the brake rotor (refer to the wheel replacement guide for assistance).

    2. Use a hex wrench to remove the five bolts that secure the brake rotor to the wheel, then simply lift off the brake rotor.

    Wheel and Fork Replacement Guide

    Fork Removal:

    1. Remove the bolt connecting the fork to the rear fork.

    Front Wheel Removal:

    (Operations similar to the initial installation of the wheel)

    1. Flip the bicycle and stabilize it on the handlebars.

    2. Use a wrench to loosen the two front wheel bolts on both sides. Locate and loosen the front wheel bolts, then remove them with a wrench.

    3. Remove the front wheel. Lift the front wheel gently off the front fork.

    Rear Wheel Removal:

    1. Flip the bicycle upside down, remove the fork (as mentioned above), and then unscrew the bolt connecting the rear wheel.

    2. Cut the tie wrap and disconnect the motor wires.

    3. Remove the derailleur and lift the rear wheel. Separate the rear wheel by removing the brake rotor (refer to the brake rotor replacement guide).

    Shifter Replacement Guide

    1. To remove the shifter, cut off the end of the shifter cable and release it from the derailleur.

    2. After removing the brake lever, throttle, and brake lever (refer to the brake lever, throttle, and brake lever replacement guide), unscrew the bolt from below the shifter, then slide it out and remove the shifter cable with the housing.

    3. When installing a new shifter, insert the cable into the groove and push it in.

    Taillight Replacement Guide

    Cut the tie wrap to loosen the connection wires, then pull and remove it. Then unscrew the bolt at the back of the taillight to remove it.

    Throttle Replacement Guide

    1. To remove the throttle, the handlebar must be removed first (refer to the handlebar replacement guide).

    2. Loosen the bolt and disconnect the wires connecting to the throttle. Pull down the throttle from the handlebar to remove it.

    Derailleur Replacement Guide

    1. Push the derailleur forward to release the chain from the crank.

    2. Unscrew the outer chip from the derailleur and release the chain from the derailleur.

    3. Unscrew the bolt of the derailleur's jockey wheel.

    4. Unscrew the center bolt that connects the derailleur to the bicycle to remove it.

    5. After removal, loosen the bolt that secures the derailleur cable and unscrew the derailleur cable from the derailleur.

    Installation Guide:

    1. When installing, first attach the derailleur to the bicycle.

    2. Next, install the middle chip and thread the chain over it.

    3. Install the outer chip, aligning the chain over it as shown.

    4. Finally, insert the derailleur cable into the derailleur and tighten it.

    Technical
    Headlight Replacement Guide

    Unscrew the headlight bolt from the front fender and disconnect the wires to remove the headlight.

    Derailleur Adjustment Guide

    1. Prepare the bike for maintenance. Remove the battery and hold the power button for 10 seconds to discharge any remaining power.

    2. Test the alignment. Rotate the pedals forward while shifting with one hand. When using the derailleur, ensure the chain smoothly moves to each gear. Test by rotating the wheel one or two full turns at a time.

    a. The shifter cable tension may be too tight. Loosen the barrel adjuster on the derailleur. Rotate the barrel adjuster on the derailleur half or full turn to loosen it.

    b. The derailleur cable may be too loose. Tighten the barrel adjuster on the derailleur. The derailleur barrel adjuster should rotate half to full turn.

    3. Switch between all gears to test alignment. Rotate the crank forward with one hand while adjusting the gears. Ensure the derailleur smoothly moves the chain from 1st gear to 7th gear.

    4. Reinstall the battery and perform a thorough test before riding.